

Camera scanning of the environment from aircraft model
I have always had a great interest in airplanes. Since I was 8 years old I started constructing my models of airplanes. The first models were very small, but also the techniques and skills of mine were also very limited. Even though the achievements of my skills were restricted, the level and quality of electronics used in airplanes at those times was quite poor (when talking about radio-controlled airplanes, such as transmitter, receiver and servos).
But the period of time since the first contact with airplanes until now is still longer. Many new fascinating products are preparing to be sold immediately, and thanks to this "new era" I can work on this project. Thanks to my father I am going to buy my new and new airplanes according to my needs and earnestness, and thanks to my friends with high skills (usually they are not just flying radio-controlled models, but most of them are real aviators with pilot as a career) I gained knowledge that I used for this project.
The aim of my project is about scanning the environment with using digital camera, radio-controlled (RC) model of airplane, and all electronics needed to fly this model in heights above the ground. I was thinking for a while and I realized that the best idea how to start doing this project is to find one of the best RC airplanes that can potentially carry even quite big camera with good quality video. The problem was not just about funds that were used for this project, but also with finding a good camera, because none of those we can see on the internet are 100 percent great for this project. At first I had good results with my model that I have already owned for few years, but unfortunately it did not give what I expected from it. Few days later I put a suggestion to buy a new airplane that will be more sufficient in carrying and that will be seen from big height. Also a good camera for this project was found and I started constructing a model of electric glider with wingspan 2.6 meters, I think it is a sufficient carrier. I took some photos from my model when it was all completed. I was very satisfied with quality of pictures, so I realized to make a webpage, to make people know about my project and its results. My first taken pictures were quickly put onto my webpage, with new videos of resolution 1280/720. I thought this project will be a big deal for me, but I was very pleasant, and hopefully I believe it will give people opportunity to discover places on our earth that they have never seen before, through the internet and from 1000 feet above our buildings
I decided to associate two Areas of interaction and I think they belong to this project naturally. Homo Faber is one of these, because I constructed many radio controlled models that have many differences, and fortunately I chose one that is the best for this project. It was not all about constructing these models, but also about calculating the profile of the wing, thanks to what I chose an airplane that will fit best for this position by means of aerodynamically properties of every aircraft, and finally its flying characteristics. I made a table where you can see main differences of every individual RC model with, or without installed digital camera.
Community and Service was also playing an important role in this project, because I made a webpage about my project and I offer camera scanning of environment to everybody. For example when somebody has a big house and his roof is damaged, the aircraft model can fly above the roof and from the close distance take some detailed pictures.
One sunny day during summer holidays spent on the airport (of course) was a key-day for my new project, when I saw an airplane Cessna C152 flying above our airport. I saw a pilot and co-pilot holding a huge camera, which was taking photos of our airport. At the same time, I was flying with my acrobatic model of airplane 100 meters lower than a real airplane. I had a great idea. My plan was not so long, due to the fact that it was not needed. The only thing that I had in my mind was to construct an airplane with low-flying speed, high lift-up weight, long sizes (the larger, the better, so that I can see it even if it flies high so that I can actually see it). Days were keeping on, and I started to look forward to gain knowledge from airplane magazines and to look for a good camera. I planned to find a good, and experienced supervisor for controlling my tuft of ideas, and to realize things that were sometimes difficult to get/gain. I planned to have more models of airplanes, so that I can choose the best one in order to compare the prices, flying-characteristics, gliding-characteristics, power setups (electronics used in them), wing-loading in grams, and many other things. Evidently, every model of airplane has something that other airplane does not have. I also planned to write a table about every model, its characteristics, and physical properties, and I planned to put this table on the internet, to show people that this idea and project is real and it has quite good results. It also helps people to choose a good airplane for camera-scanning, if they want to try
it on their own airplanes, including some tips and tricks. Finally, I planned to have a maiden flight of my best-flying airplane with my digital camera onboard, and to take a video, and shoot some pictures, and put then on the internet, too. Then I planned to use the equation, by which everybody can calculate, if his/her model of airplane is good enough, to carry a camera with weight m (calculated according the profile of the wing and its characteristics and sizes).
I also planned to buy an airplane with four electric motors, that can potentially carry even a big camera, but after some calculations, measurements, and conversion with a manufacturer of this model, I decided to cancel this plan.
Hopefully the last thing I planned was to convert the movies from .mov to .mpeg, to play it by Windows Media Player, then to cut boring parts of the video, and to put final videos on my website.
When I have already had this idea about camera-scanning from RC airplane in my mind, I wanted to try it by myself, on my own airplanes. One of the first airplanes that I had was a Trainer, with wingspan two meters, powered by a combustible engine, and was constructed from wood. In those times, I did not have a good and light weight camera, but just a horribly heavy video camera using a video tape. My uncle borrowed me a quiet light camera, Fuji, which is not so expensive, because at those times I did not even know if my Trainer will be possible to carry something additional, and I had never tried it before. On the 27th of October, I had a first flight with installed camera. The result was quite good, but the vibrations coming from the combustible engine were too great. The video was vague, and straggly.
It is important to say, that every model that I construct is made by some company. I buy a kit of every model, and I construct it and assemble all parts together. Constructing a model only by my hands is not needed for this project, it is too demanding in the case of time, and also many types of equipment are needed, and the result can not be proved (flying characteristics of the final product can be unpleasant, caused by wrong equipment, not wrong knowledge)
After a time, I came up with a new idea, and new model of airplane. It was called a Superzoom, acrobatic small airplane with low weight and great flying characteristics. It was all constructed from foam except elevator, which was from special plastic material, to have higher efficiency in drastic and sharp maneuvers. The wingspan was 1 meter. I used the same camera as in the previous model. The final video was very good, the resolution of video was just 640/480, which was the maximum for that camera, but it was much better than shooting a video from Trainer, due to the fact that the vibrations were minimized thanks to the electric motor. After few days, I constructed a servo that will control a shutter of the camera. I started taking photos from my airplane using the fifth servo that was pushing the shutter of my camera. Superzoom was powered by a special electric brushless motor, with high force - about 6N, so it can take up 0.6kg. In this area it is one of the quite high-pull motors. This model is constructed from a special foamy material - EPP . I tested this model with installed digital camera Fuji. Unfortunately, this model was too small, and trying to get as good pictures as I expected was not possible. To shoot very good pictures, I had to fly with this model very high, but the wingspan was too small and I did not see it well, and I had to fly lower near the ground. The results were not as good as I expected, and this was the time when I started thinking about some new radio controlled model
This equation is called a Renoyld´s number (Re). Re is the parameter without any dimension that describes the ratio between the friction forces and sternway forces of molecules, which are flowing through the profile of the wing. The higher the value of Re is, the higher lift and lower resistance can be anticipated. The value of the Re is most influenced by geometry of the profile of the wing, and the shape of the wing. The enumeration of the Re is very easy thanks to many simplified structures that help us.
The Re can be calculated by the equation
Re = 68 000 x b x V
, where b is the depth of the profile of the wing (every airplane has different depth of the wing, in meters (m)), V is the velocity of the flight of the airplane (when we want to have more exact result, we put there the minimum speed of the airplane, by which the airplane can be controlled without the loss of good flying characteristics still, in meters per second (m/s)), and 68 000 is a constant. The minimum Re is 68 000, it means, that airplane with lower Re than 68 000 could not fly. [1]
EXAMPLE for my airplane called Cularis:
My Cularis have depth of the wing b=0,05m, the minimum speed needed to scan from my airplane with digital camera onboard is 25m/s. Then the result is Re=85000. It means, that my model is able to fly, by not also to fly, but to carry a camera of weight 250g. If somebody will have an airplane with Re 68000, it means, that it could not carry a camera neither. If the model has Re of the value 100 000, it means, that his model is able to carry a camera of 350g. The higher the Re, the better the flying characteristics and the heavier the camera can a model carry.
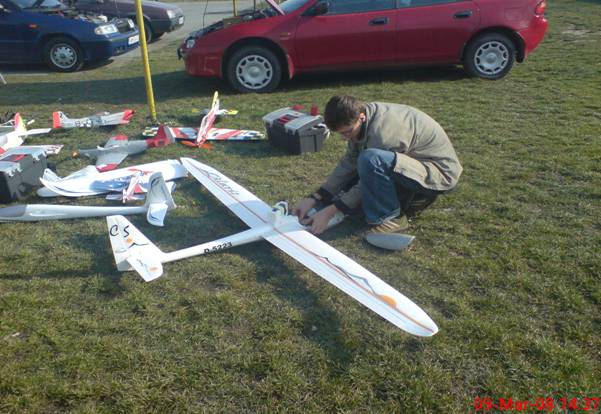
I was reading many magazines about airplanes, and I was visiting websites connected with models of airplanes. On one of the websites (www.rcm-pelikan.cz) which is actually a shop that sells models, I saw there a kit of one very interesting model of airplane. It was called a Cularis, electric glider with wingspan 2600mm, which is partly described in the introduction. I went to Prague with friends to buy this kit, because it is much cheaper there. I also found there many interesting and very advantageous shops, that I cannot see anywhere here in Slovakia. I bought there also remaining electronics that are required for having a model complete. These electronics were for example servos, Lipol batteries, receiver that works on 35 MHz, alternative-current regulator, electric alternative-current motor. Without these electronics, a plane could not fly. Therefore, I had to buy very high quality electronics, to prevent damage or final crash of the whole airplane. On the other hand, comfort that brings product of high quality is also very pleasant.
At the same time, I was trying to find some most reliable digital camera with very good technical properties. At first, I found a Casio digital camera with video resolution 1280/720, but after seeing the most important part of the technical specifications, which was a mass, I was really unhappy about it. The weight of the camera was too big even for a great glider with good carrying and lift characteristics. So I started finding further. After having a conversation with my father, I gained some knowledge from him and I had an idea of a digital camera that best suits for this position and this purpose. After few days, I found a camera that is the one I wanted to find. It is called Kodak Easyshare Z1275. The video resolution is in HD resolution (1280/720), and with very low mass, which was surprising me. On the next day, 23rd of December, I went to Trnava by bus, where I made an agreement with the company called Nay, where they can sell this camera to me with a little discount. The weight of the camera is 200g, with 12Mpixels and resolution 4000/3000 for pictures. When I came back to home, I started using this camera and learning things about it. I realized this is the best camera that can be bought in these times compared to resolution and size.
After having some experiences with my new camera, I started constructing my new airplane. First I opened a box of the kit, I had a great feeling of high quality product when I saw all the parts very precisely cut on the machine. Every parts of the kit, which includes rudder, elevator, fuselage, wings cut to four pieces, and other requirements needed for complete assemble, were perfectly meshed together. Assembling was provided by a second-apply glue, so that the construction was not so difficult and it was quick. Moreover, I used knowledge that I gained from 6 years of my previous work. Therefore construction lasted just 2 weeks of working (2 till 3 hours per day). Construction was quite quick compared to the beginner, when talking about assembling this type of airplane. I think I would rather avoid
the description of the process of assembling this model, because I think it was all about gluing parts of the kit together, and installing electronics into the airplane, and it will be not interesting for the reader of this essay. However, despite of the fact that the construction of my new airplane reached the true final, I met with really serious problems that occurred before the maiden flight of this airplane.
Unfortunately, I had a problem with my electric alternative-current regulator, but after few conversations with my consultant, this problem was overcome. I had to buy another regulator, with better excess of amperes entering each servo. I had 6 servos in the model, and it is more than any regulator can carry. The solution was to buy new special regulator that was constructed especially for this type of use.
My first flight was accomplished on 3rd of January. I used older and havier Nickel Cadmium (NiCd) batteries, and firstly I flied with this model without my Kodak digital camera onboard. I did this step to be sure, if the center of gravity is in the right place where it should be. After two more flights, I used my new Lipol batteries and I installed my Kodak digital camera onboard. My father threw the airplane to the air, and it started climbing moderately. The controls worked properly. The airplane is 200grams heavier than during the first flight (because of the camera), but the airplane did not change its great flying characteristics.
When having 5 videos recorded from my new airplane - Cularis, I decided to make a webpage, and to put there all the videos I have recorded, so that everybody can look at my website and make a decision if it is good. I also offer for people to scan their environment from my model of airplane. Using a converter, I will convert a movie file .mov to .wmv, so that I can cut the movie and separate into parts by using a program Windows Movie Maker.
Advantages of this project and way how I can realize my project is written in the section Analysis of the process.
I think I hit the goal of my project. I had scanned the environment with my new airplane, I was able to compare few models of mine, and finally I chose the best one, which I will present to people. During the period of time when I was doing this project, I gained a lot of knowledge and I experienced how our country looks like from the air, 300 feet above the ground. I also met with many problems. Fortunately, when I had a problem, I had a conversation with the person that is a specialist in this area (usually my consultant and father), and with a help of my friend, I came over this problem and found appropriate solution. My project was longer than I expected, because I met with problems, and I wanted to make my project of very high quality in the case of a final product. The process of building my new airplane called Cularis was longer than I expected.
I think I hit the import of Areas of Interaction. When talking about the Community and Service, I had a little qualm about the final product that is actually webpage where I have my videos. I came with an idea of putting the offer for other people to scan what they want from the air. But after having some flights with my airplane, I discovered great controlling and flying characteristics, so I realized it will be not so difficult for me to overcome this feeling and to offer my idea to others. Therefore, I wrote the reasons for having such an idea of scanning the environment from model aircraft.
Camera scanning of the ground from the height of 30 m to 100 m becomes very useful for viewing hardly accessible places.
For example when somebody has a big house and his roof is damaged, the aircraft model can fly above the roof and from the close distance take some detailed pictures.
Sophisticated model of aircraft can also monitor the situation of the road traffic. The model can fly high above the traffic jam or close to a car-crash in the city and take some pictures or a short video and send it by the internet to the public.
Similar situations also appear at the railway or in the water. The model can fly to the troublesome places and take and send valuable pictures from there.
The intelligent model aircraft can be useful for checking electricity and telecom open-wire lines.
Models of airplanes are comparatively cheap and one can buy the model of aircraft in every city. Flying the model needs training and practice. I use models of airplanes that are very quiet. They are powered by the electric motors, which prevent vibrations. Each model of aircraft is controlled by a transmitter and a receiver. The transmitter can control the aircraft up to the distance of three kilometers. Each model can scan the environment take the pictures everywhere within 500 m range.
Every remote control works in a specific frequency. My transmitter works at the frequency 35 MHz. Every remote control must have pair of crystals. These crystals work at a specific channel.
I installed a digital camera into two models of airplanes.
The first one is the acrobatic airplane from the special foam that has the wingspan about one meter and that is powered by an electric motor. This motor is called brushless, it means that during the operation of this motor the friction is lower and the efficiency is higher. The consumption of the motor is over 12 A with efficiency about 78%. I use lipol batteries due to the fact that they have very light weight and have big discharge current.
Another airplane is from the wood and has the wingspan of two meters. This airplane is powered by the bigger brushless electric motor with the force about 350 N. I use Nickel Cadmium batteries in this airplane.
I have installed Finepix Fuji F420 camera with weight of only 180g including batteries. After this experiment I started working on my airplane called Cularis. Description of construction of this model is included in the Description of the process.
I had checked the situation before I started scanning of the environment from my acrobatic model.
I asked many wise people about this project and I gained knowledge. I started taking photos from my airplane using the fifth servo that was pushing the shutter of my camera.
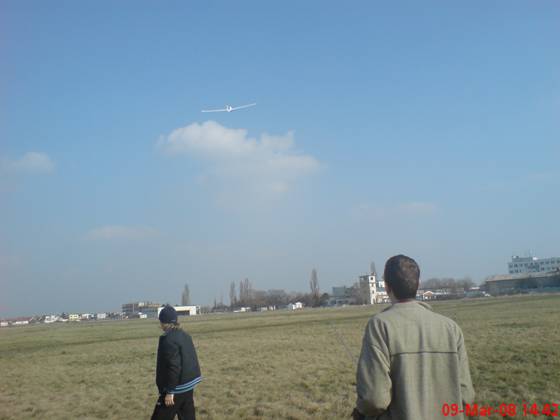
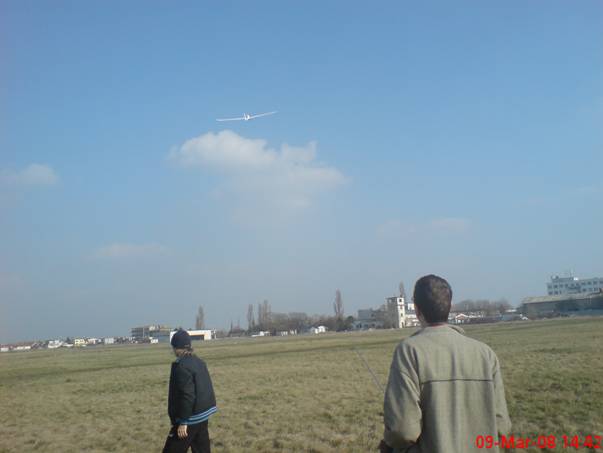
I would like to have my own webpage to show the public the pictures I take with my aircraft model. I have already scanned the area of our small airport and I have some photos attached with this project.
I would also like to go to some other places and take more pictures useful for other people.
I used to work with several types of radio controlled models of airplanes. My first radio controlled model that was able to carry at least 150g had a wingspan about 1metre, and it was an acrobatic model. I tested this model with installed digital camera Fuji. Unfortunately, this model was too small, and trying to get as good pictures as I expected was not possible. To shoot very good pictures, I had to fly with this model very high, but the wingspan was too small and I did not see it well, and I had to fly lower near the ground. The results were not as good as I expected, and this was the time when I started thinking about some new radio controlled model.
Controlling the airplane with installed camera is not so difficult, but you need practice and many ideas for better results.
Flying with radio controlled airplane is not so difficult, when we use special features that nowadays technique can give us. Years and Years ago, there were just cameras that not allowed anybody to take some pictures or a video from the radio controlled model, due to the fact that there were enormously heavy and the people could not be satisfied with them compared to this-age digital cameras. As you can see, the investigation and evolution of new digital cameras goes on, and there will be still better and better digital cameras, the ratio between price and technical specification will be lowering. Just few months ago, there have been released some new digital cameras with very low weight, and higher resolutions. Until now, some of the cameras had also very low weight, but the quality of pictures and taken movies can not be compared to digital cameras released to the shop for costumers nowadays. I was just browsing the internet few weeks ago, and I found a special digital camera from Kodak - Easyshare Z1275. It is a very special digital camera with astound great resolutions for taking pictures - 4000x3000 pixels, and amazing video resolution - HD video resolution - 1280x720 pixels. As I can compare products from other companies, Kodak is not a company with great tradition, but with great products. Panasonic, the worldwide known best company that sells electronics, with the newest digital camera release - Panasonic Lumix was tested by me in the shop Nay. The video resolution was only 640x480pixels, with very low quality, and lower quality pictures. This camera is 50 dollars more expensive than Kodak Easyshare Z1275, but with somehow lower and poorer results. As soon as I had known about that digital camera from Kodak, I went to a city Trnava to buy it there. I made a video, and I am really satisfied with this digital camera. I will be using this camera not only for the purpose of scanning the environment from my models until the end of this project, but also for home use.
This project was a great chance for me to broaden my technical skills and theory in the area, where I spend most of my time that is actually my very favorite activity. Every part of this project was done by using different types of skills and techniques, and thanks to this fact I learned how to manage things and to connect my opinions into one work.
My final product, the webpage and videos from my airplanes were done successfully, but there were things I would rather change and add. Also the videos were not so great, because more that a third of all the videos had to be cut because they could not be used for the project, due to the fact that the camera was installed under a wrong angle. Also when the airplane was turning opposite to the shining sun, my Digital camera was under attack of strong rays that could potentially damage the camera, and the video.
On the other hand, when I consider how many funds I put into this project, the result is very good. It is obvious that if more money will be put to realize this project, the quality and strength of this project will be perfect. Furthermore, the electronic managers and scientists are still going further and electronic products are going to be better and better in close future. It is a very important aspect of this project. Maybe after few years, when the electronics will be on the different level, this project will meet its aim in the eyes of many people, and it will be famous. In addition, I started hearing from the television about the remote controlled killing machines, or radio controlled fighter airplanes, where pilots were replaced by receivers and many other electronics, that work on the same principle as my radio-controlled model of airplane with digital camera onboard.
[1] Redakce časopisu, (2008) Rc Modely, . Czech Republic
Most of the knowledge I gained by the 8 year's practice of flying on the airport Vajnory. I gained knowledge from the people that were helping me while I was practicing. These people were mostly professional career pilots that have a hobby connected with radio-controlled airplanes. I gain knowledge from magazines about airplanes called Rc Modely and Rc Revue which I read very often every month. I read a British magazine about big real airplanes, called Pilot, from which I gained a general knowledge about airplanes of this age. Also my consultant and my friends helped me very much in the terms of theoretical knowledge.
Pictures:


|
Politica de confidentialitate |
| Copyright ©
2024 - Toate drepturile rezervate. Toate documentele au caracter informativ cu scop educational. |
Personaje din literatura |
| Baltagul caracterizarea personajelor |
| Caracterizare Alexandru Lapusneanul |
| Caracterizarea lui Gavilescu |
| Caracterizarea personajelor negative din basmul |
Tehnica si mecanica |
| Cuplaje - definitii. notatii. exemple. repere istorice. |
| Actionare macara |
| Reprezentarea si cotarea filetelor |
Geografie |
| Turismul pe terra |
| Vulcanii Și mediul |
| Padurile pe terra si industrializarea lemnului |
| Termeni si conditii |
| Contact |
| Creeaza si tu |